Everbearing Strawberries: Maximizing Your Harvest

Strawberries, with their vibrant color and sweet flavor, are a beloved addition to gardens worldwide. Among the various types of strawberries, everbearing strawberries stand out for their unique ability to produce fruit throughout the growing season. Cultivating these delightful berries requires just a little maintenance and some basic information. In this article, we will explore the essential steps to ensure a bountiful harvest of everbearing strawberries, from planting to harvest time. All by someone who’s had to learn from scratch.

Planting in Early Spring

To kickstart a successful strawberry patch, you’ll want to plant your strawberries in early spring. Once the ground is thawed and workable with moderate temperatures, it is ready to receive your new plants. If it’s early enough in spring, even your plant starts may look deader than dead. But, fear not, your plants will take!

In fact, growing strawberries isn’t commonly a problem – the problem is getting fruit the first year. That’s because in its first year, a strawberry plant will focus on establishing its root system rather than growing fruit. Typically, fruit comes in the second season – but we can trick nature by planting bare-root strawberry plants. These plants come ready with their root structures intact and is usually successful in fruiting in the first year.

Choose a location that receives full sun for optimal growth and fruit production. If temperatures get unseasonably hot, providing shade will ensure that your plants don’t get singed, but your plants will love everyday sun. Ensure proper spacing between plants, allowing 15-20 inches of distance between each strawberry plant (they will fill in, promise!). When planting, bury the roots only up to the crown level to prevent rot and encourage healthy growth.

Understanding Strawberry Varieties

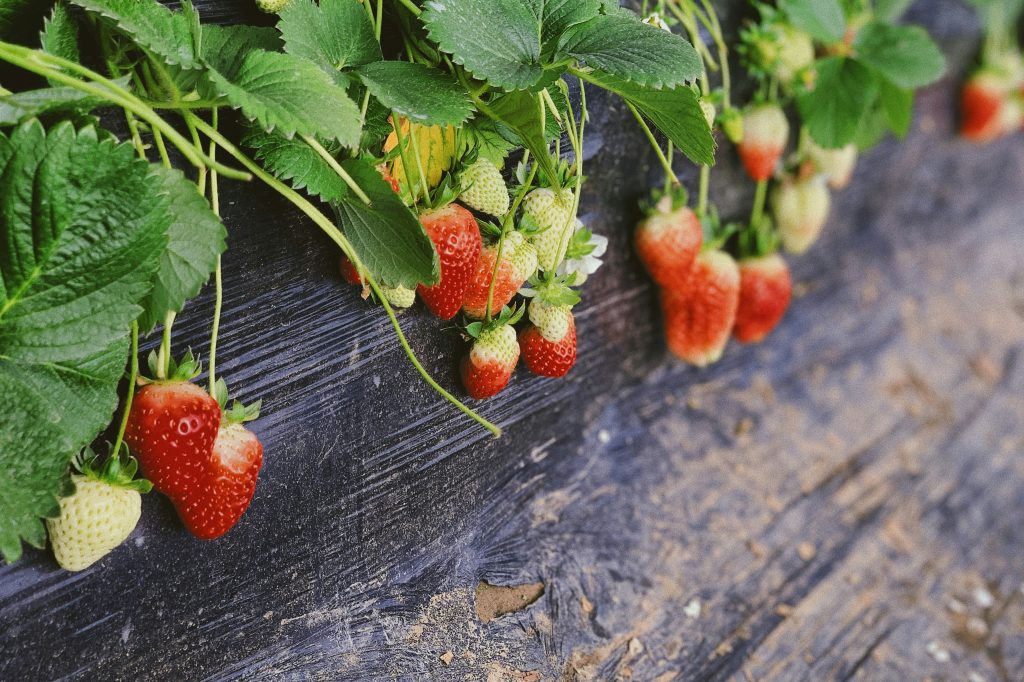
There are three main types of strawberries: everbearing, day-neutral, and June-bearing. Everbearing strawberries, as their name suggests, produce fruit continuously throughout the growing season, providing multiple harvests. Day-neutral strawberries also produce fruit consistently, regardless of day length. In contrast, June-bearing strawberries yield a single crop in June and require specific daylight conditions for fruiting. Understanding the unique characteristics of each variety enables you to plan your garden accordingly and maximize your harvest potential.

The first strawberries I grew were a June-bearing variety that were the sweetest smelling and most delicious white berries my family had ever eaten! With such a short fruiting period though, we were left wanting more after fighting every animal in the sky and on land for them over a two-week period. It was enough for my family to get a taste for having strawberries around – so we tore up that bed and replaced the eight-foot, by four-foot bed with everbearing strawberries. A no-brainer for the strawberry-obsessed!

Choosing the Right Fertilizer

Maintaining the correct soil pH is essential for the health and productivity of everbearing strawberries – so opt for a pH-neutral fertilizer (your local garden center will know just what you need). Regular fertilization throughout the growing season will support bumper crops of delicious berries all season long.

Light Requirements

Everbearing and June-bearing strawberries rely on daylight conditions to initiate fruiting. Ensure that these varieties receive at least 12 hours of daylight daily to promote flowering and fruit set. Pay attention to potential frost events, especially during the critical fruiting period for June-bearing strawberries. Early frosts can damage the plants and significantly reduce your strawberry harvest. Protective measures such as row covers, or frost blankets can help safeguard your crop during periods of inclement weather.

Maintaining Productive Beds

Although everbearing strawberries are prolific producers, they require regular maintenance to ensure long-term productivity. Strawberry beds typically last around four years before the plants begin to decline in vigor and fruit quality. To prolong the lifespan of your strawberry patch, periodically remove runners that emerge from the plants. This practice directs the plant’s energy toward fruit production rather than vegetative growth, resulting in larger and sweeter berries.

Protecting Against Pests

Birds are notorious strawberry enthusiasts and can quickly decimate a ripe berry patch. Prevent avian visitors from feasting on your harvest by installing bird netting over your strawberry plants. Secure the netting tightly to prevent gaps where birds could enter and enjoy the fruits of your labor. Additionally, monitor your strawberry patch for signs of other pests, such as slugs or aphids, and take appropriate measures to control infestations and minimize damage.

Keep strawberries off the ground for the best quality fruit. Offer a bed of hay or mulch to help retain water in the soil and keep fruit dry.

Your Turn!

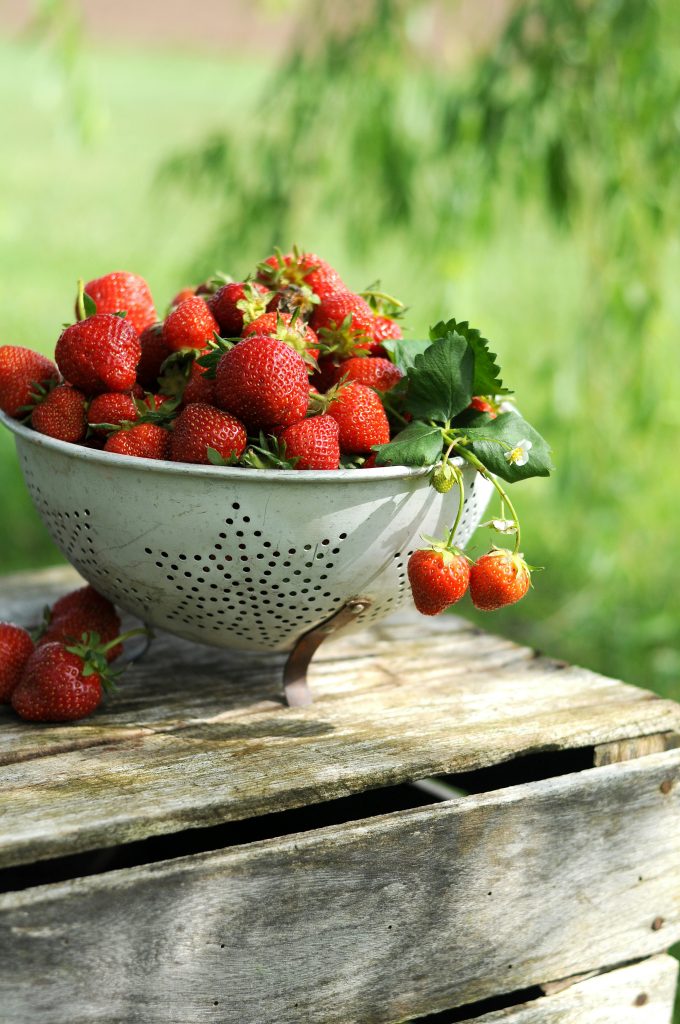
Growing everbearing strawberries can be a rewarding experience for gardeners of all skill levels. By following these essential tips, you can maximize your strawberry harvest and enjoy a continuous supply of delicious berries throughout the growing season.

Looking for strawberry recipes? Click here for 43 Fabulous Strawberry Recipes!

How to Grow Garlic From A Clove

Of all the plants in the garden, none have made such an impact on our culinary lifestyle as garlic. Not only is it an important ingredient in a vast array of cooking traditions from Italian to Mediterranean, Asian, and Middle Eastern, it has even made its way into folklore and myths as a way to ward off evil spirits and vampires. And while almost every person on planet Earth couldn’t do without it, my mother complains every time it is used – without fail. My conclusion? Mother is a vampire. Explains her love of ballroom dance.

Keeping My Mother Out of Your Garden

Whether you’re plagued by vampires or not, you can never have enough garlic in the garden, in my opinion. Learning how to grow garlic from a clove begins with timing – the clove(s) needs to be planted in mid-to-late fall. Where I live, that means that I can use my garden beds all summer for their entire season and plant garlic going into the off-season. Early spring brings bright green shoots bursting through the soil. By the end of March, the garlic in the garden is offering beautiful and welcome green to the scene. In June, the garlic is ready, and my garden bed becomes available for the next crop of carrots or beets to grow in their place while the garlic dries. Okay, Okay, we’re getting ahead of ourselves. Let’s start at the beginning:

Choose Your Weapon

If you’ve never paid much attention, you might think there’s only one kind of vampire repellant on the market. But with a little interest, you’ll find that there are garlic heads in all kinds of shapes, sizes and varieties! Whether you’re looking for a compact variety for spicy impact or elephant garlic for its mild garlicky boost, just grow what you like to eat!

Hard or Soft Neck?

Garlic comes in two distinct variations – hardneck and softneck. Hardneck generally have a punchier taste, woodier paper and will produce a scape. A garlic scape is a delicacy that grows upward from the garlic stalk before the garlic is ready. It is generally cut once it has grown one full turn and is pointing upward again. Enjoy these scapes chopped, pickled or sauteed for a mild boost. Softneck varieties don’t produce a scape, but they can be braided into the long, beautiful braids you see hanging from the rafters in Italy. Most garlic at the grocery store are softneck varieties because they have a longer shelf life.

While I like to recommend visiting a local farm or nursery to buy the healthiest heads of garlic, in a pinch you can even grow garlic from the supermarket. Either way, look for healthy-looking bulbs with unbroken skin.

Before you can grow garlic from a clove, it needs to be broken away from its neighbouring cloves in the rest of the head. Break down your chosen heads of garlic into cloves by gently pulling them apart but don’t remove their protective paper. If your efforts are successful, each of these cloves will become a whole head of garlic.

Prep Your Medium

Grow Garlic From a Clove

When growing garlic from a clove, the plant will do best in rich soil. Make sure the soil drains well and doesn’t pool water on the surface. Be sure to mix in some compost or well-rotted manure-based fertilizer before planting to condition the soil, and/or ask your garden center for a garlic-specific fertilizer. If you like it technical, garlic likes a pH of 6-7.5.

Put Your Plan into Action

Growing garlic from a clove requires placement of 6 inches of distance from the next clove and one foot from the next row. This will ensure that your garlic has room to grow naturally without interference.

An index finger plunged into the soil provides a channel to slide the clove 2 inches under it. Insert the clove with the pointed end facing upward. This pointed end is what will eventually produce the germ and eventually the stock of the head of garlic.

Before You Retreat

The finishing touches on your garlic include water and mulch. First, water in the garlic until you’re sure the soil is damp around the clove. Now, cover your garlic bed in a healthy 1-2 inch layer of mulch. This can include chopped-up branches, dried leaves, commercial mulch or storebought straw. This layer will suppress weeds, insulate the garlic during the cold of the winter, and will ensure that soil erosion due to wind and water is kept to a minimum. Keep your garlic moist throughout the growing season, but do not over-water.

Early Spring

In early spring, offer your garlic bed another blast of nutrients with some of your remaining fertilizer from planting. This will give your garlic a bump in nutrients through the growing season which will support it up until harvest.

Garlic drying
Garlic heads drying

Harvesting Your Garlic

When growing garlic from a clove, they will eventually start to look a little ‘sorry’ – that when you’ll know it’s almost time to harvest! Garlic will begin to yellow and dry as its bulb reaches full size, letting you know it’s time to dig it up. Begin by gently lifting a central head out of the soil with a garden fork and checking for size to determine whether or not to go forward with the harvest or wait another few days for some additional growth.

Lay your harvested garlic out to dry in a dry, warm environment for 2-3 weeks before cutting stalks for storage or braiding. Congratulations!! You have successfully grown garlic from a clove! Want to braid your vampire repellant into a fashionable neck piece? See how here.

Churned Butter at Home

churned butter

When I was young, my grandfather tried to gut a jackfish in front of my sister and me. The reaction he got from us was biblical – crying, screaming, the whole thing. Before long he gave up, placed Jack back in the pail of water he’d come up in, and let us watch as he swam away unharmed. My ‘squeamishness’ that day is regularly brought up at family gatherings where everyone reinforces what a wimp I am. (It’s been 35 years, I think the horse is dead…) It has taken me until my 40th birthday to realize that I’m really not squeamish in most situations. What happened that day was a reflection of my lack of exposure to things in life that would bolster my resilience when faced with something new.

Years Later

At my house, my mother was so allergic to almost all animals that my exposure to them was essentially nil. No shit – I had to strip down in our attached garage and immediately launder everything I wore if I had stepped foot in a friend’s home. And it wasn’t just my mom that stood between me and animals, either. Once, we got an opportunity to ride some horses at a family member’s acreage, but the fun was immediately cut short because my sister’s face and eyes were swelling.

At that age, who could fault me for not being able to pet a dog comfortably – let alone gut a fish? Gradually, I began to see my lack of understanding of animals extended to the flora around me, too. I had moved to a beautiful coastal town in 2020 and the exposure to all the lush green rainforests around me called at me to do, learn, and experience more. So, I did what any sane person would do and went directly into my fears to face them head-on. I started a huge garden, learned to filet fresh salmon out of the river (H is best at this), and got a dog. I washed chicken eggs, sewed boat covers, homeschooled, and found friends who wanted to live the same way.

Now that my children are old enough to understand, I want to imbue them with as much knowledge about the nature of our earth as I can. I don’t want them to be young adults who can’t identify all the vegetables at the grocery store – you know, the ones who are 40 and still putting ranch on every damn thing?

I want my kids to understand where food comes from and how it goes back to the earth in a cycle that supports all life. I want them to understand more of the world in general. So, where should I begin? I searched my memory basket and remember making churned butter in a Mason jar as a small child (and wondering if it would ever end). It’s easy, inexpensive, and provides lots of opportunities to discuss how this important resource was made in the past. This would be perfect.

Churned Butter

  • Start by purchasing 2 cups of whipping cream. Any attempt to use a low-fat alternative here will fail!
  • Let your whipping cream come to room temperature before pouring it into your mason jar or stand mixer. (I took pity on my little guy and we used the stand mixer).
  • Start your stand mixer on low and gradually increase the speed until just before the cream splatters and makes a mess. Place a tea towel over the mixing machine to catch any splatter that does occur.
  • Continue to run your mixer this way until it forms a thick whipped cream.
  • After taking a mandatory sampling or two of your whipped cream, turn the mixer up again and keep churning the butter until it splits into what looks like butter and cloudy water (this “water” is buttermilk).
  • Pick your butter up and run cold water over it butter as you knead it into a ball
  • If you want to salt your churned butter, sprinkle some in now. If you want to add herbs and seasonings, click here for a few ideas.
  • Reserve the buttermilk to get the most out of your whipping cream!
  • Click here to see butter churning in action.

Why Churning Your Own Butter is Better

  • You control the quality of the butter by using quality ingredients
  • You get access to the freshest product (especially when you make small batches regularly)
  • Education – your child learns more about traditional foods and how they are made
  • It’s easy and fun!

Using Your Leftover Weigh

You’ve just made your first batch of home churned butter! Now you can turn your attention to that leftover weigh you set aside when it separated. Although the possibilities are endless, we love to use it in these buttermilk pancakes. For other ideas of what can be done with your leftover buttermilk, check out this list.