How to Prepare Pumpkins: From Baking to Roasting and Beyond

Fall is pumpkin season, a time for cozy flavors and seasonal kitchen projects. Pumpkins are incredibly versatile, and preparing them at home can make dishes fresher and more flavorful. Whether you’re looking to make a creamy pumpkin puree for soups and pies, crispy roasted pumpkin for salads and sides, or crunchy pumpkin seeds as a tasty snack, this guide on how to prepare pumpkins will add to your confidence in working with these beautiful garden jewels.

Choosing the Right Pumpkin
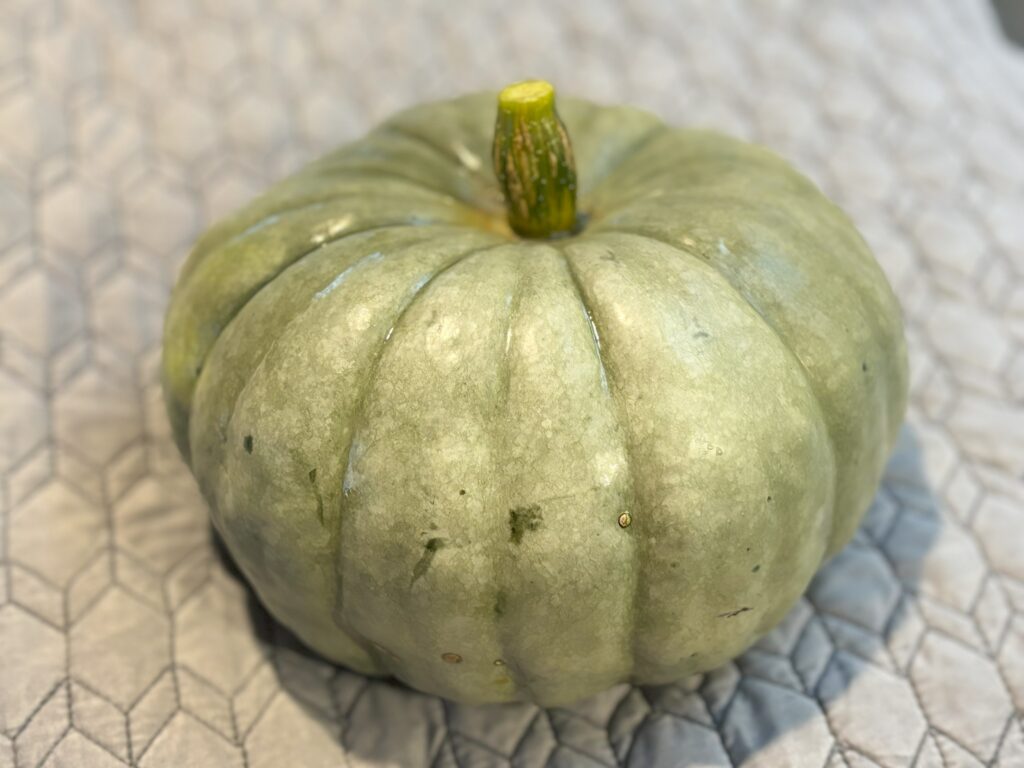
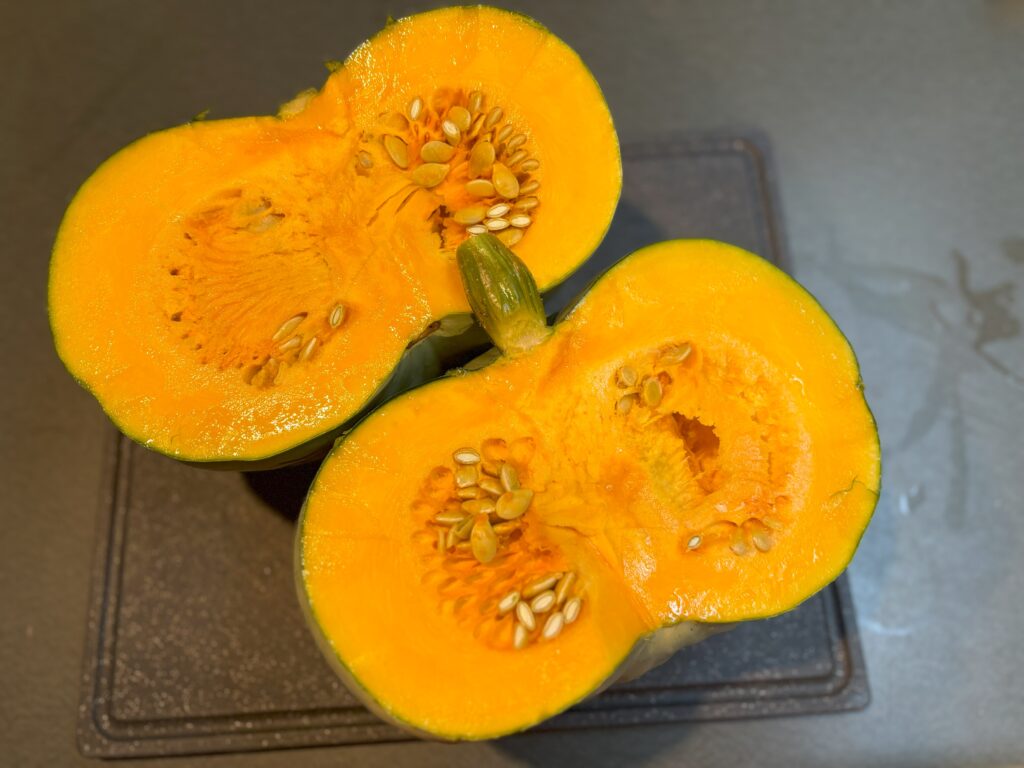
When it comes to cooking, not all pumpkins are created equal. For most culinary purposes, look for smaller “sugar pumpkins” or “pie pumpkins.” These pumpkins have a sweeter, smoother flesh and are easier to handle than large carving pumpkins, which tend to be stringy and bland. Choose a pumpkin that feels heavy for its size with a firm skin and no soft spots. I have chosen a jarrahdale pumpkin (isn’t she gorgeous?).

How to Bake Pumpkins for Pumpkin Puree

Pumpkin puree is the backbone of countless fall recipes, from pies to soups to muffins. While canned pumpkin puree is convenient, making it from scratch brings a deep, earthy flavor and natural sweetness.

 What You’ll Need:

– 2 small or one average sized pumpkin

– Baking sheet

– Parchment paper or Silpat liner
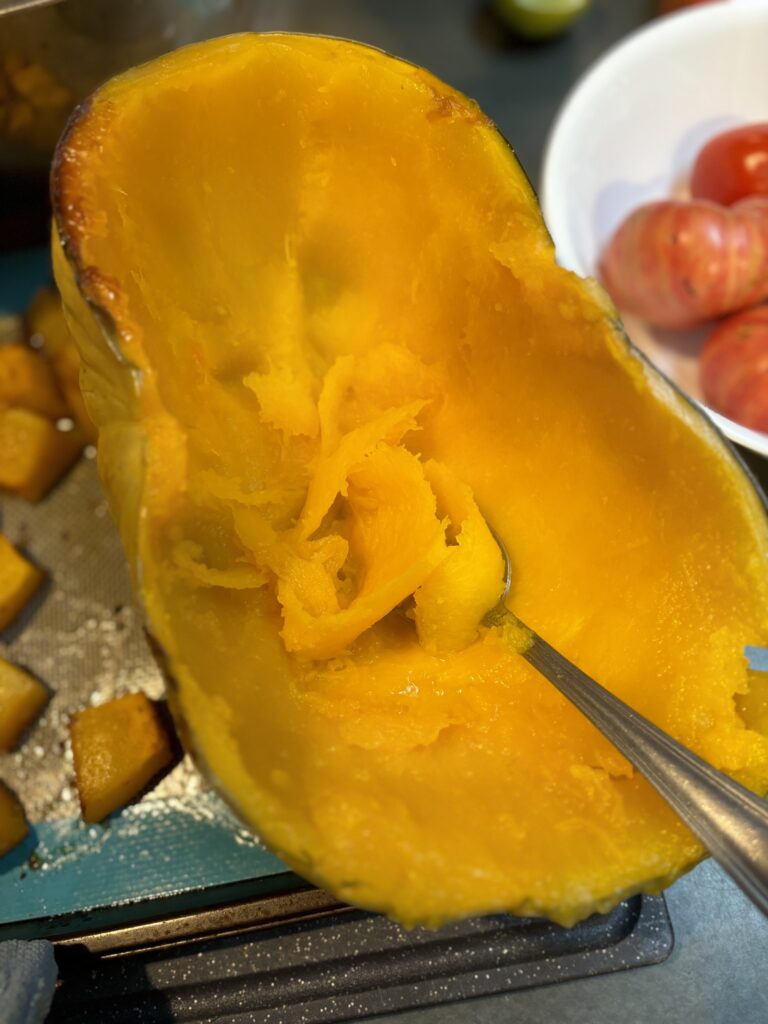
How to Bake Pumpkin for Pumpkin Puree

Pumpkin puree is the backbone of countless fall recipes, from pies to soups to muffins. While canned pumpkin puree is convenient, making it from scratch brings a deep, earthy flavor and natural sweetness.

 What You’ll Need:

– 2 small or one average sized pumpkin (sugar or pie pumpkins)

– Baking sheet

– Parchment paper or Silpat liner

Step-by-Step Instructions:

1. Preheat the Oven: Set your oven to 400°F (200°C).

2. Slice the pumpkin in half using a sturdy knife. Be careful, as pumpkins can be tough to cut. Use a spoon to scoop out the seeds and fibrous strands. Save the seeds if you want to roast them later.

3. Line a baking sheet with parchment paper (optional for easier cleanup). Place the pumpkin halves cut-side down on the sheet.

4. Roast the pumpkin in the oven for 40-50 minutes, or until the flesh is soft when poked with a fork. The skin may start to collapse and pull away from the flesh.

5. Let the pumpkin cool for a few minutes, then scoop out the flesh. Discard the skin.

6. Add the cooked pumpkin flesh to a food processor or blender and puree until smooth. If the puree is too thick, add a small amount of water as needed.

Storing Your Puree

Fresh pumpkin puree can be stored in the refrigerator for up to a week or frozen for up to three months. Portion it out in airtight containers or freezer bags, and you’ll have ready-to-use puree for soups, pies, or even smoothies.

How to Roast a Pumpkin

Roasted pumpkin cubes make a delicious side dish or a versatile ingredient to add to salads, grain bowls, or pasta dishes. Roasting caramelizes the natural sugars, bringing out a rich, nutty flavor.
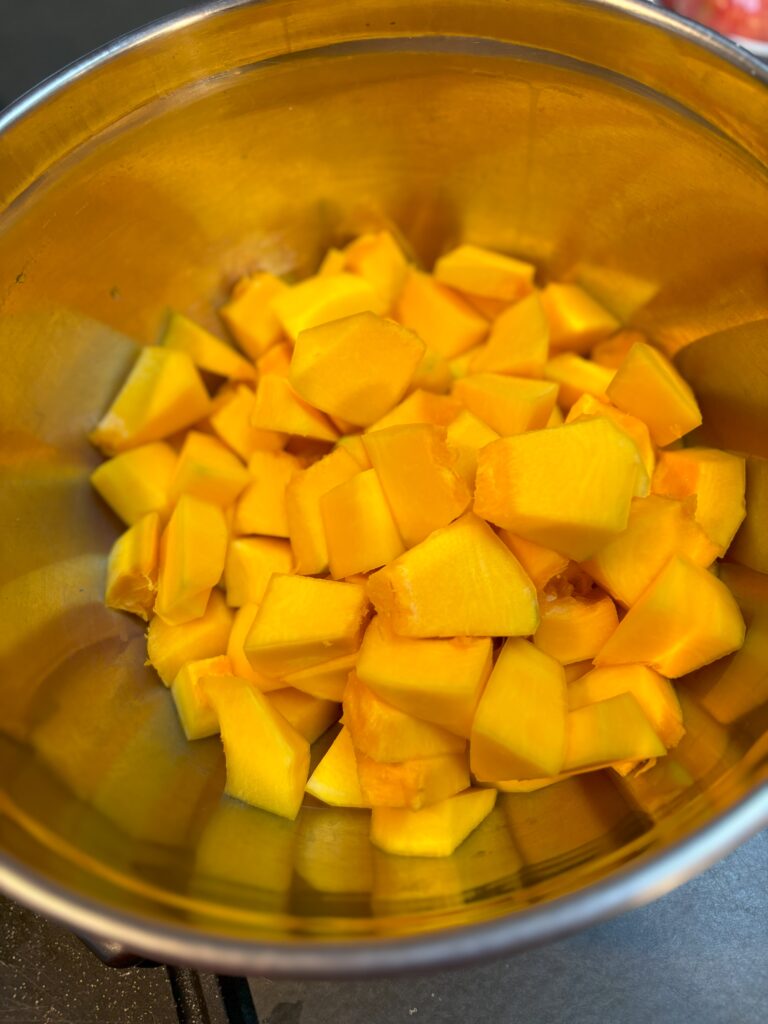
What You’ll Need:

– 1 small pumpkin (sugar or pie pumpkin)

– Olive oil

– Salt and pepper

– Optional spices: cinnamon, nutmeg, cumin, or paprika

Serving Ideas

Roasted pumpkin can be enjoyed on its own, tossed with greens and grains, or stirred into pasta. Leftovers can be refrigerated and added to meals throughout the week. Roasted beets pair beautifully with this preparation. Find Your Guide to Baking Beets Whole here.

How to Roast Pumpkin Seeds

Pumpkin seeds are nutritious and make for a crunchy, savory snack. They’re packed with protein, fiber, and healthy fats and can be easily seasoned to your liking.
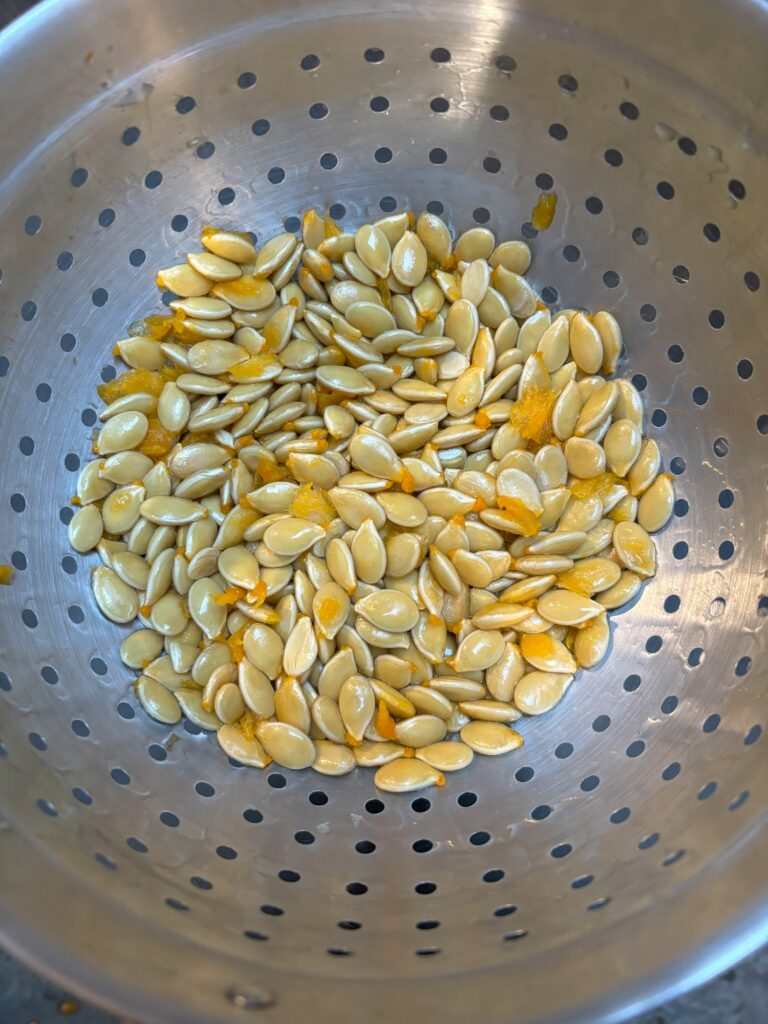
What You’ll Need

– Pumpkin seeds (from a cleaned pumpkin)

– Olive oil or melted butter

– Salt

– Optional seasonings: garlic powder, cayenne pepper, smoked paprika, cinnamon, or nutmeg

Step-by-Step Instructions

1. Rinse the seeds thoroughly in a colander, removing as much of the pulp as possible. Spread them out on a paper towel or clean kitchen towel to dry.

2. Preheat the Oven: Set your oven to 300°F (150°C).

3. Once dry, place the seeds in a bowl. Drizzle with a small amount of olive oil, sprinkle with salt, and add any spices or seasonings you like. Toss to coat evenly.

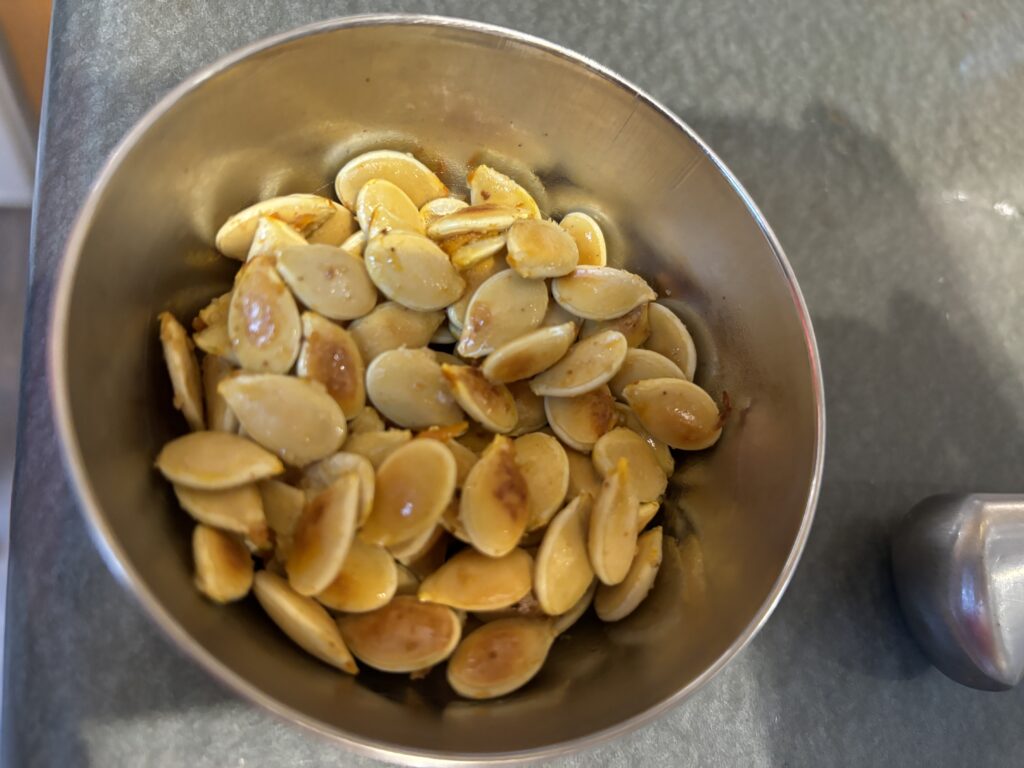
4. Spread the seeds in a single layer on a baking sheet. Roast for 20-30 minutes, stirring occasionally (every 10 minutes) to prevent burning. The seeds should be golden and crispy when done.

Storage

Once cooled, store roasted pumpkin seeds in an airtight container at room temperature for up to a week. They make a great snack on their own or a crunchy topping for soups and salads.
Tips for Working with Pumpkins

Save the Skin: In some recipes, you can leave the skin on, especially if you’re roasting thin wedges. Pumpkin skin becomes tender and adds fiber and a subtle earthiness to the dish.

Experiment with Seasonings: While pumpkins have a sweet, mild flavor, they pair well with both sweet and savory spices. For a sweet treat, try cinnamon, nutmeg, or brown sugar; for savory dishes, experiment with garlic, rosemary, or cayenne.

Use Different Cooking Methods: Besides baking and roasting, pumpkin can also be steamed, boiled, or sautéed. However, baking and roasting are best for bringing out a concentrated flavor.

Nutritional Benefits of Pumpkin

Pumpkin is packed with nutrients and is relatively low in calories. Here are some of the health benefits:

High in Beta-Carotene: The bright orange color of pumpkin is due to beta-carotene, an antioxidant that the body converts to vitamin A. This nutrient is essential for immune health, vision, and skin.

Good Source of Fiber: Pumpkin contains both soluble and insoluble fiber, which helps with digestion, blood sugar regulation, and satiety.

Rich in Vitamins and Minerals: Pumpkins are loaded with vitamins C, E, potassium, and magnesium, all of which support cardiovascular health, immune function, and overall well-being.
Creative Uses for Leftover Pumpkin

If you have extra pumpkin puree or roasted pumpkin, try these ideas:

Add to Smoothies: Blend with yogurt, bananas, and spices for a creamy, nutritious smoothie.

Make a Pumpkin Soup: Simmer puree with vegetable or chicken stock, garlic, and spices. Blend for a smooth, comforting soup.

Bake with It: Pumpkin adds moisture and a subtle sweetness to muffins, bread, and pancakes.

Final Thoughts

Learning how to prepare pumpkins at home is rewarding and allows you to enjoy its fresh, vibrant flavors in various dishes. Whether you’re aiming for a smooth puree, caramelized roasted cubes, or crispy seeds, these methods will help you make the most out of this seasonal favorite. Enjoy the warmth, color, and taste that pumpkin brings to your autumn meals! For more information on delicious fall eats, see our guide to baking beats whole.

Apple Butter Recipe

Apple butter is one of those timeless kitchen creations that carries the warmth of home in each spoonful. For many of us, the scent of simmering apples brings back cherished memories, like watching my grandmother slowly cook apples until they transformed into a deep, rich spread. I loved her apple butter for its simplicity, its versatility, and the way it made everything from morning toast to a bowl of vanilla ice cream taste like a cozy, spiced celebration of autumn.

The Beauty of a Simple Recipe

Sometimes, the simplest recipes are the best. Apple butter requires only a few ingredients and some time to allow the apples to cook down and caramelize. Unlike some recipes that rely on lemon to keep the apples from browning, apple butter skips that step, embracing the natural color change that occurs as the apples simmer. In the end, everything will turn a lovely shade of brown, creating a spread that tastes even better than it looks.

Beyond being easy to make, apple butter is also a fantastic way to use up an abundance of apples. Whether you have apples from a trip to an orchard or just a surplus from the grocery store, apple butter allows you to transform those apples into something that will last for weeks, even months. Let’s dive into the essentials for making apple butter and look at a few ways to put a unique spin on this comforting classic.

A Basic Apple Butter Recipe

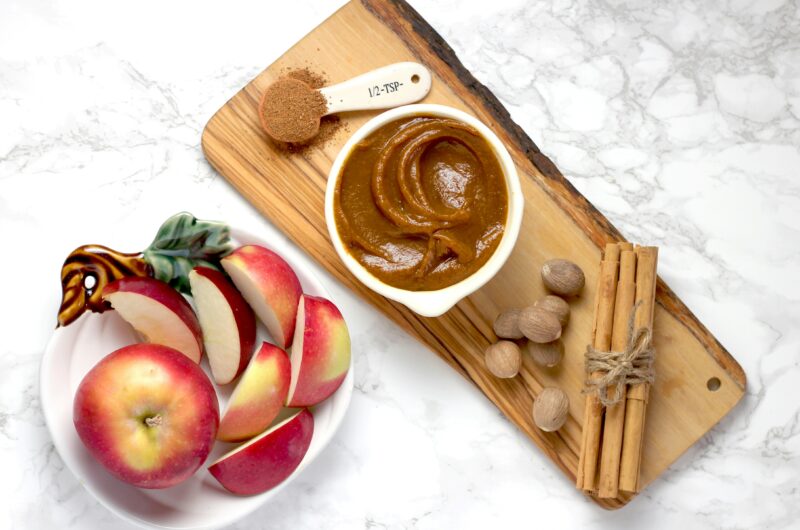
The key to a good apple butter recipe lies in cooking the apples low and slow, allowing the natural sugars to caramelize and the flavors to deepen. While each family has its own take, the following recipe provides a solid foundation.

Ingredients:

  • Optional: a pinch of ground allspice or cardamom for added warmth
  • 4-5 pounds of apples (choose a blend of sweet and tart varieties)
  • 1 cup of apple cider or water
  • 1 to 1 ½ cups of sugar (adjust based on your taste and the sweetness of your apples)
  • 2 teaspoons ground cinnamon
  • ¼ teaspoon ground cloves
  • ¼ teaspoon ground nutmeg
  • ¼ teaspoon salt

Instructions:

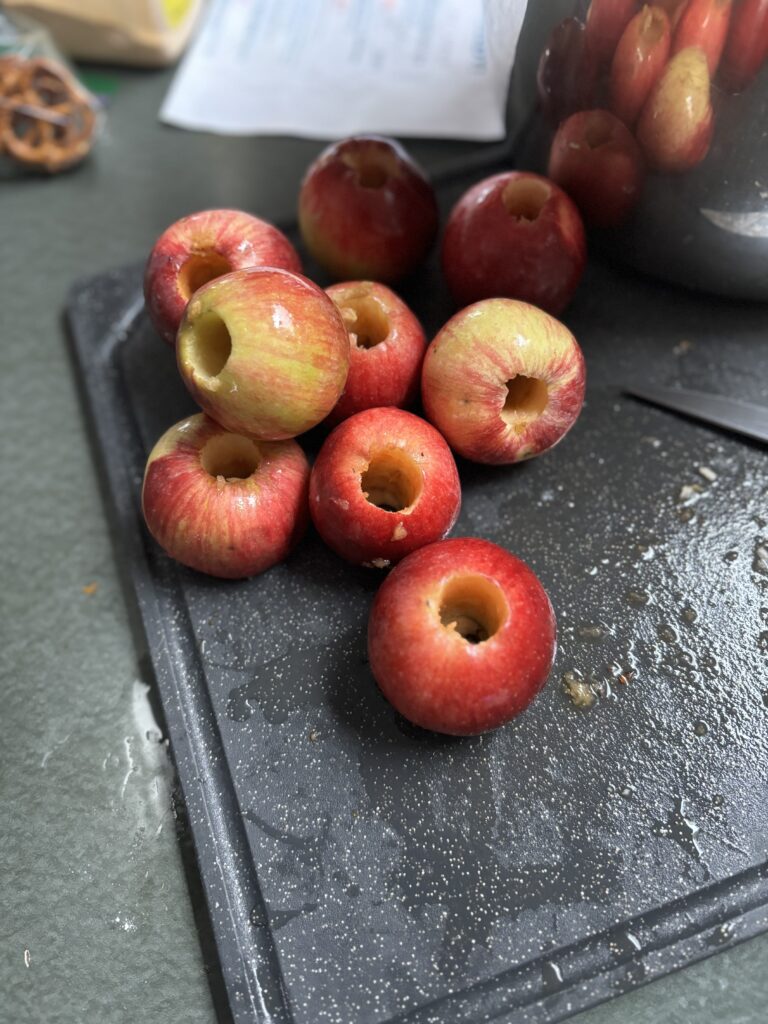
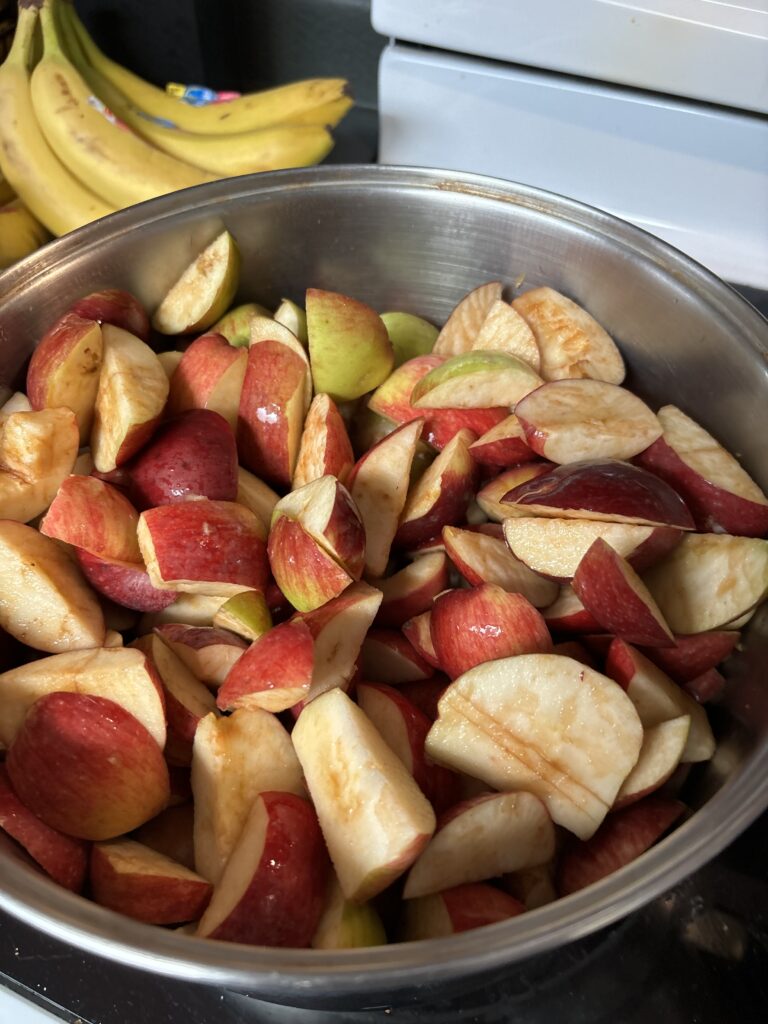
  1. Prepare the Apples: Core and chop the apples; you can leave the skins on, as they’ll break down during cooking or can be blended later for a smoother texture.
  2. Cook the Apples: Place the chopped apples in a large pot or slow cooker with the apple cider or water. Cook on medium heat until the apples start to soften, then lower the heat and cover, letting them cook until they are very soft, stirring occasionally.
  3. Add the Sugar and Spices: Once the apples have broken down, add sugar, cinnamon, cloves, nutmeg, and salt. Adjust the amount of sugar based on how sweet you like your apple butter and the flavor profile of your apples.
  4. Reduce the Mixture: Uncover the pot, stirring occasionally, and continue cooking on low heat. As the mixture thickens and darkens, you’ll see it turning into that classic apple butter consistency.
  5. Blend to Perfection: Use an immersion blender or a regular blender (carefully, if hot) to blend the apple mixture until smooth. If you prefer a chunky apple butter, skip this step.
  6. Continue Cooking: To achieve a thicker consistency, continue cooking after blending, stirring regularly to prevent sticking. The longer it cooks, the richer and thicker the butter will become.
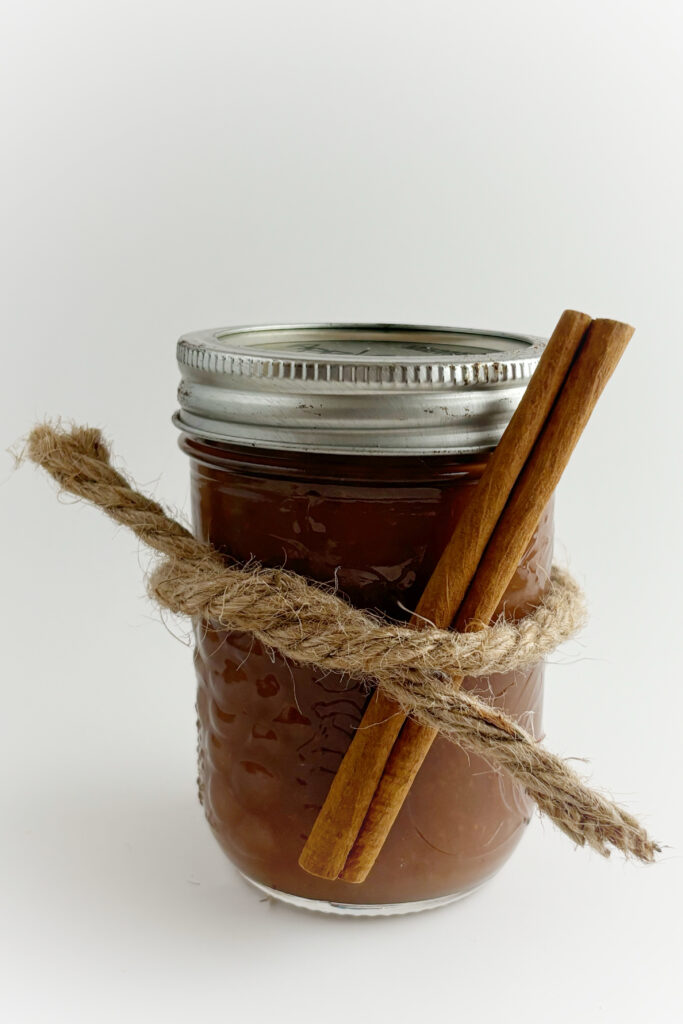
  7. Cool and Store: Once done, allow the apple butter to cool. Transfer it to sterilized jars and store in the fridge for up to three weeks, or process in a water bath for longer storage.

Customizing Your Apple Butter

The beauty of apple butter lies in its adaptability. While cinnamon, cloves, and nutmeg are classic spices for this spread, you can play with different spice blends to make it your own. Here are a few variations:

Classic Cinnamon-Only Apple Butter: Keep it simple with just cinnamon. This creates a light, versatile spread that lets the apple flavor shine.

Chai-Inspired Apple Butter: Add a mix of cinnamon, cardamom, and a hint of ginger. This combination gives the apple butter a cozy, exotic twist, reminiscent of chai tea.

Warm Autumn Spices: A blend of allspice, nutmeg, and cloves brings out the flavors of a classic apple pie, making each bite feel like a mini dessert.

Bold and Spicy Apple Butter: For a spicier spread, increase the cloves or add a touch of ground black pepper. This works well as a condiment for savory dishes like roast pork.

How to Enjoy Apple Butter

One of the best things about apple butter is its versatility. Here are a few ways to enjoy it beyond the classic toast:

  • On Breakfast Foods: Spread it on warm toast, muffins, pancakes, or waffles. It’s a fantastic topping for oatmeal or overnight oats, adding natural sweetness and flavor.
  • As a Dessert Topping: Apple butter pairs beautifully with vanilla ice cream, pound cake, or crepes. Swirl a spoonful into yogurt for a quick, fall-inspired treat.
  • In Savory Dishes: Use it as a glaze for roasted meats like pork or chicken. The sweetness of the apple butter adds depth and complexity to savory dishes.
  • In Baking: Apple butter works as a filling for thumbprint cookies, a spread for pastries, or even as an ingredient in cakes and muffins.

Preserving and Sharing Apple Butter

Since apple butter is often made in larger batches, it’s a wonderful gift for friends and family. You can preserve apple butter by canning it in sterilized jars, making it a lasting treat that you can enjoy throughout the year. Plus, gifting a homemade jar of apple butter is a thoughtful way to share the season’s bounty and your love of homemade traditions.

Tips for Perfect Apple Butter

  • Choosing the Right Apples: A blend of apples works best for apple butter. Tart apples like Granny Smith or McIntosh add a bit of tang, while sweeter varieties like Fuji or Honeycrisp bring natural sweetness.
  • Adjusting for Thickness: If you want a thicker apple butter, you can cook it down longer or even cook it uncovered for the final hour to evaporate more moisture.
  • Sweetness and Spice Levels: Feel free to adjust the sugar and spices to suit your taste. Taste as you go, especially if you’re trying a new spice blend.

A Tradition Worth Keeping

For me, apple butter is more than just a spread; it’s a reminder of family and simpler times. Watching my grandmother carefully simmer her apple butter, tasting it as it thickened, and filling jars with the fragrant, spiced spread was an experience filled with warmth and nostalgia. And now, each time I make apple butter, I get to recreate those memories and pass them along.

Whether you’re making it for yourself, preserving it for later, or giving it as a gift, apple butter is a versatile, delicious way to make the most of fall’s apple harvest. So, gather your apples, choose your spices, and set aside a cozy afternoon for this slow, rewarding process. It’s a tradition worth keeping and a recipe that will keep your autumn flavors alive all year long.

Thinking of preserving your apple butter? Check out our introduction to canning jars, lids and pressure cookers here.

Apple Butter Recipe

Difficulty: Easy

For the most delightful apple butter, you’ll need:

Ingredients

  • 5 lbs your favourite apples

  • 1 cup water

  • 1-1.5 cups brown sugar

  • 1tbsp vanilla

  • 1/2 tbsp cinnamon

  • 1/8 tsp clove (opt)

  • 1/8 tsp nutmeg (opt)

Directions

  • Wash your apples
  • Slice and core the apples and place in an insulated pot on medium
  • Add the rest of the ingredients, including spices, to the pot
  • Cook, stirring occasionally, until apples are soft (approx 30 mins)
  • With an immersion blender, blend the apples into applesauce. If you don’t have an immersion blender, a standard blender can be used. Return applesauce to the pot.
  • Turn your burner down to low and allow to cook uncovered for 10-12 hours.
  • When the apple butter is a deep brown and has reached your preferred thickness, turn off the heat and allow to cool. The mixture will thicken slightly once cooled.

Chocolate Marshmallow Cookies

If you’re looking for a delightful, easy-to-make treat that’s as fun to eat as it is to bake, then these marshmallow cookies are exactly what you need! Soft, chewy, and topped with gooey marshmallows, these cookies have a rustic charm and a texture that’s to die for. Whether you’re whipping up a batch for a special occasion or simply craving something sweet, this recipe will quickly become a favorite in your kitchen.

One of the best parts about this recipe? The dough doesn’t need to be chilled before baking, which means you can satisfy your cookie cravings that much faster. In addition, keeping the marshmallow on top of the cookie, instead of sealing it inside like in many other recipes, gives these cookies a unique, chewy, almost taffy-like texture. It also creates a beautifully rustic look that makes each cookie feel a little extra special.

Ingredients for Marshmallow Cookies

Here’s what you’ll need:

  • 1/2 cup coconut oil: Adds moisture and a subtle sweetness.
  • 1 1/4 cups all-purpose flour: The base for the perfect cookie texture.
  • 1/2 cup cocoa: For rich, chocolatey flavor.
  • 3/4 tsp baking soda: Helps the cookies rise.
  • 1/2 tsp salt: Balances out the sweetness.
  • 2/3 cup brown sugar: Keeps the cookies soft and adds depth of flavor.
  • 1/4 cup chocolate chips or sliced almonds: For added texture and a flavor boost.
  • 1 egg: Binds the ingredients and adds richness.
  • 1 tsp vanilla extract: Enhances all the flavors.
  • 3/4 cup marshmallow fluff: Mixed into the dough for gooey goodness.
  • 6 halved marshmallows for topping: Toasted on top for that irresistible golden finish.

Do you prefer butter in your chocolate marshmallow cookies? Go ahead and substitute with churned butter at home.

Directions

Step 1: Preheat Your Oven

Preheat your oven to 350°F (175°C). This is the perfect temperature to bake your cookies, allowing them to rise slightly while staying soft and chewy.

Step 2: Mix the Wet Ingredients

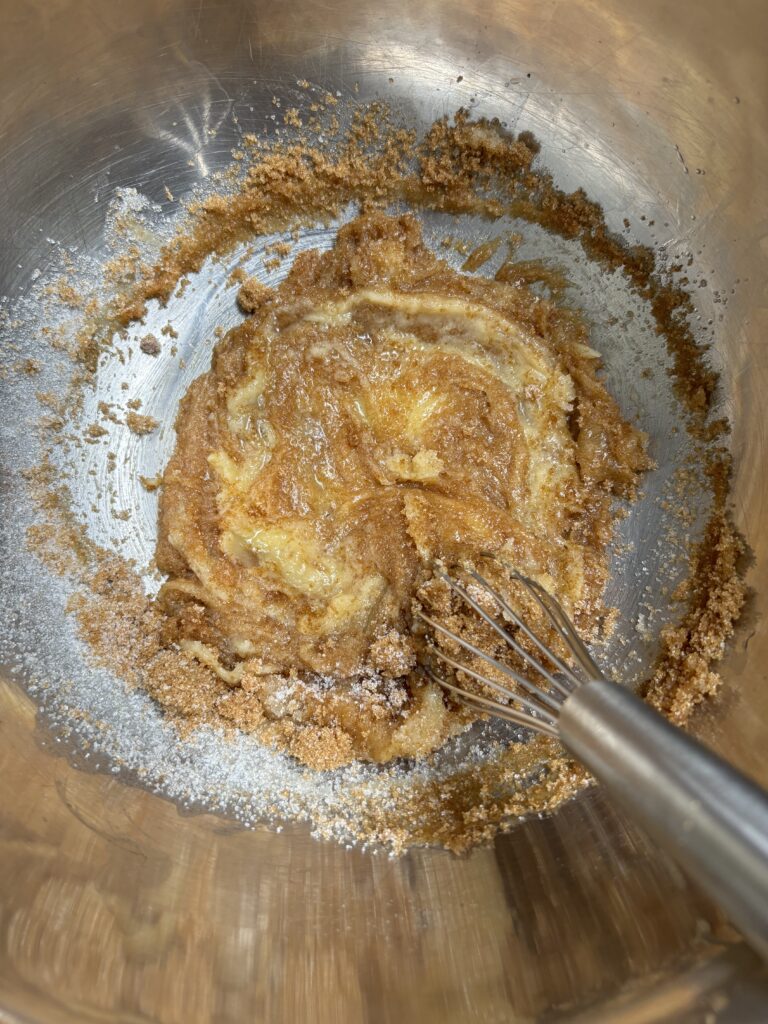
In a medium bowl, cream together the coconut oil, brown sugar, and white sugar. Once combined, mix in the egg and vanilla extract. This creates the base for your cookie dough.

Step 3: Prepare the Dry Ingredients

In a separate bowl, whisk together the flour, cocoa, baking soda, salt, and your choice of chocolate chips or sliced almonds. Stir everything together until it’s evenly distributed.

Step 4: Combine and Mix

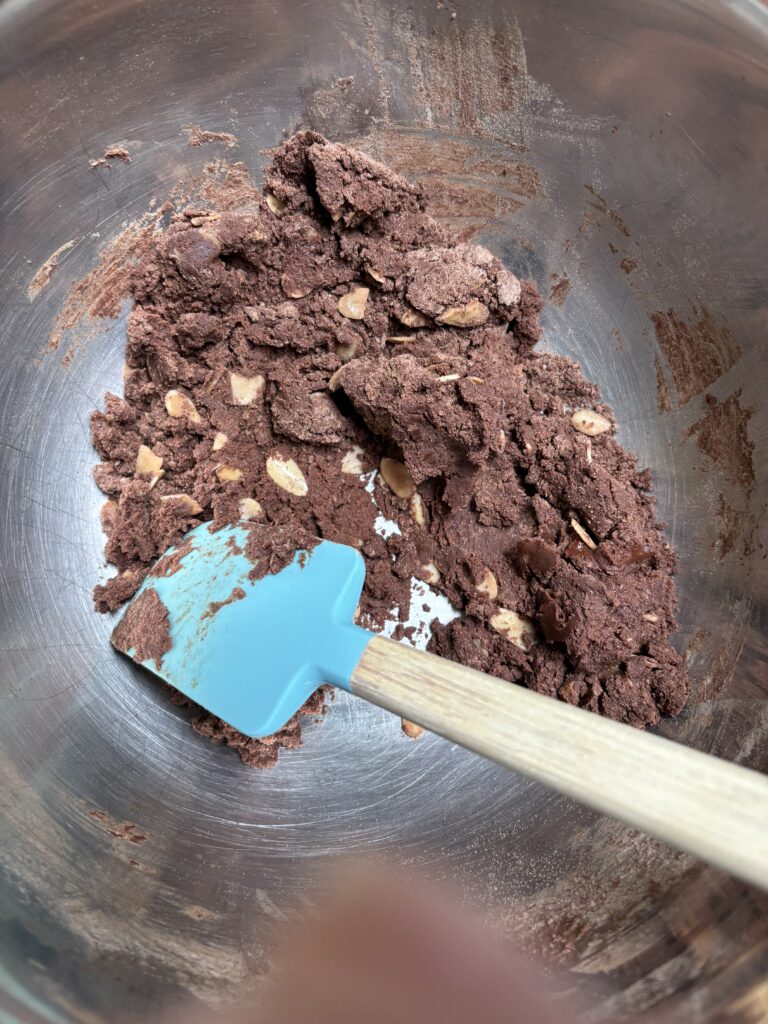
Gradually add the dry ingredients to the wet ingredients, mixing until the dough starts to come together. The dough might appear crumbly at first, but as you continue to mix, it will form into a soft, pliable dough. If the dough is too dry, you can add a teaspoon of milk to help it bind.

Step 5: Form the Cookie Dough Balls

Using a spoon or cookie scoop, divide the dough into 12 even portions. Roll each portion into a ball and place them on a parchment-lined baking sheet. These cookies will spread slightly while baking, so leave enough space between them.

Step 6: Top with Marshmallows

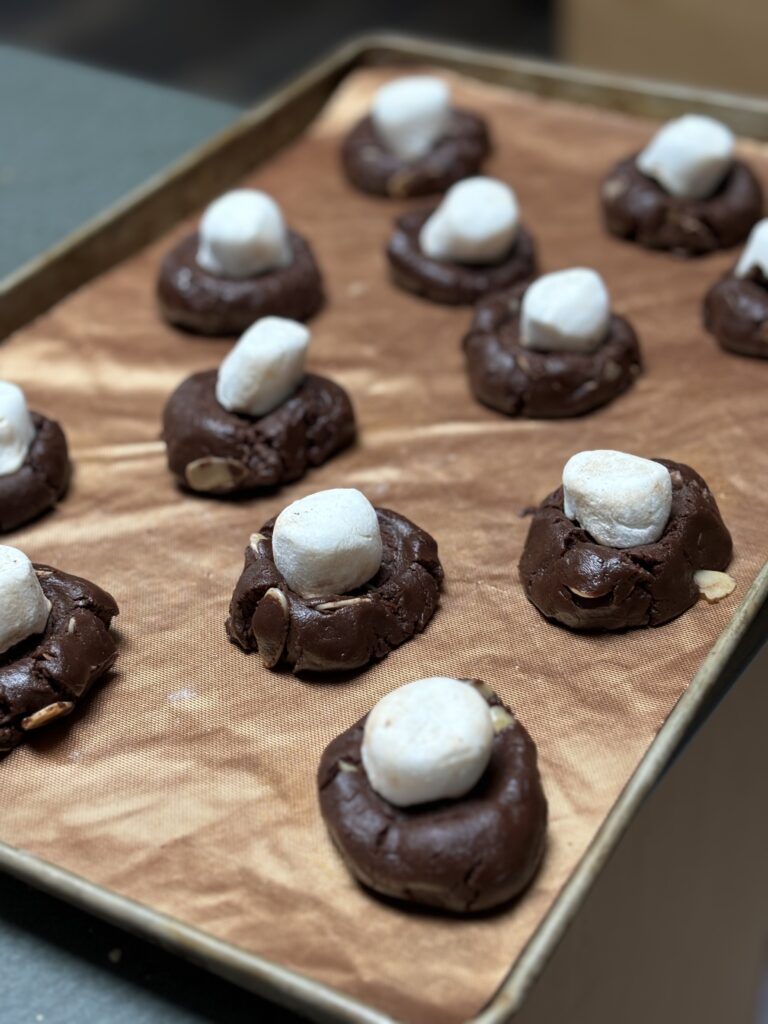
Gently press a halved marshmallow into the top of each cookie dough ball. Press just enough to secure it in place without squishing it down too much. Flatten the dough balls slightly to help them spread evenly in the oven.

Step 7: Bake to Perfection

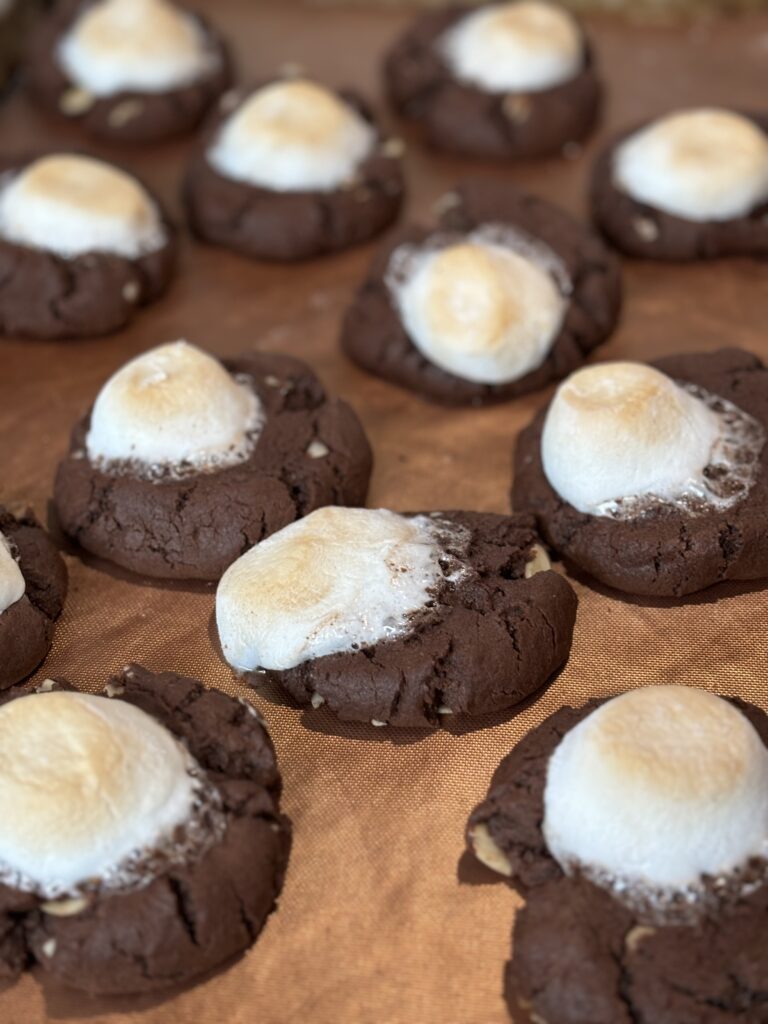
Place the cookies in the oven and bake for 8-10 minutes at 350°F. You’ll know they’re ready when the marshmallows puff up and turn golden brown. Be careful not to over-bake them—you want to keep the cookies soft and chewy.

Step 8: Cool and Serve

Once baked, let the cookies cool on the baking sheet for about 5 minutes to allow the marshmallows to set. Afterward, transfer the cookies to a cooling rack to finish cooling completely. Or, enjoy them warm for an extra gooey marshmallow treat!

Why This Recipe Works So Well

One of the key reasons I love this marshmallow cookie recipe is its simplicity. The fact that the dough doesn’t need to be chilled means you can go from mixing to baking in no time. Chilling dough is often necessary to prevent spreading, but this recipe avoids that step entirely while still yielding perfectly shaped cookies.

Another aspect I love is how this recipe keeps the marshmallow on top of the cookie, instead of hiding it inside. This makes the marshmallow puff up and toast while baking, giving the cookies a chewier, more taffy-like texture. Not only does this enhance the flavor and texture, but it also creates a more rustic appearance, which adds to the homemade charm. Each bite is filled with gooey, chocolatey goodness, paired with the perfect marshmallow topping.

Customizing Your Cookies

This recipe is versatile and can be adapted to suit your preferences. Here are a few ideas:

  • Extra Chocolate: Add more chocolate chips or even white chocolate chips for a sweeter bite.
  • Nutty Additions: Substitute the almonds with walnuts or pecans for a richer flavor.
  • Gluten-Free Option: Swap the all-purpose flour for a gluten-free flour blend, and ensure your marshmallows and chocolate chips are gluten-free too.
  • Vegan Version: Use a flax egg (1 tablespoon ground flaxseed mixed with 3 tablespoons of water), vegan marshmallows, and chocolate chips, or check out these vegan marshmallow cookies.

Final Thoughts

These marshmallow cookies are everything you want in a treat: quick to make, chewy, chocolatey, and just the right amount of gooey. Whether you’re baking them for a special occasion or just because, they’re sure to impress anyone who tries them.

With no need to chill the dough and the marshmallows proudly sitting on top, this recipe offers a delightful twist on traditional marshmallow cookies. So, next time you’re in the mood for something sweet, give these cookies a try—you won’t regret it!


Enjoy your delicious, homemade cookies, and don’t forget to share them (or keep them all to yourself)!

Chocolate Marshmallow Cookies

Recipe by adminDifficulty: Easy
Servings

12

servings
Prep time

15

minutes
Cooking time

10

minutes

Ingredients

  • 1/2 cup coconut oil

  • 1 1/4 cup all-purpose flour

  • 1/2 cup cocoa

  • 3/4 tsp baking soda

  • 1/2 tsp salt

  • 2/3 cup brown sugar

  • 1/4 cup chocolate chips or sliced almonds

  • 1 egg

  • 1 tsp vanilla

  • 3/4 cup marshmallow

  • 6 halved marshmallows for topping

Directions

  • Preheat your oven to 350 degrees F.
  • In a bowl, cream together coconut oil, brown and white sugar, egg, and vanilla.
  • In a separate bowl, combine flour, cocoa, baking soda, almonds, and salt.
  • Mix to combine, adding dry ingredients to wet ingredients. (The dough will look crumbly)
  • With a spoon, divide dough into twelve and roll each into a ball.
  • Top each with half a marshmallow and press to flatten slightly.
  • Bake at 350 degrees Fahrenheit (175 Celsius) for 8 to 10 minutes.
  • Allow marshmallow to cool before moving your cookies to a cooling rack.

The Best of the Fava Bean Recipes

In every family, there are recipes that transcend generations, binding members together with shared memories and familiar flavors. In my family, one such dish is our hearty fava bean stew—a recipe steeped in tradition, evoking warmth and comfort in every bite. This stew is more than just a meal; it’s a symbol of our heritage, a dish that has been passed down from grandparents to grandchildren, each generation making it their own while staying true to its humble origins.

Fava bean recipes have long been a staple in Mediterranean cuisine, valued for their earthy taste and nutritional richness. For my family, fava beans represent both sustenance and simplicity, a food that was always available no matter the season or circumstances. My grandparents, immigrants who knew the value of frugality and flavorful cooking, often relied on fava beans as the base for many meals. This stew, in particular, became a favorite, not only because of its ease and affordability but also for the deep, savory flavors it brings together.

The Recipe: How to Make Our Hearty Fava Bean Stew

This fava bean stew is easy to prepare, making it a perfect go-to for a weeknight dinner or a leisurely weekend meal. Here’s how you can make it yourself and bring a little taste of my family’s tradition to your kitchen.

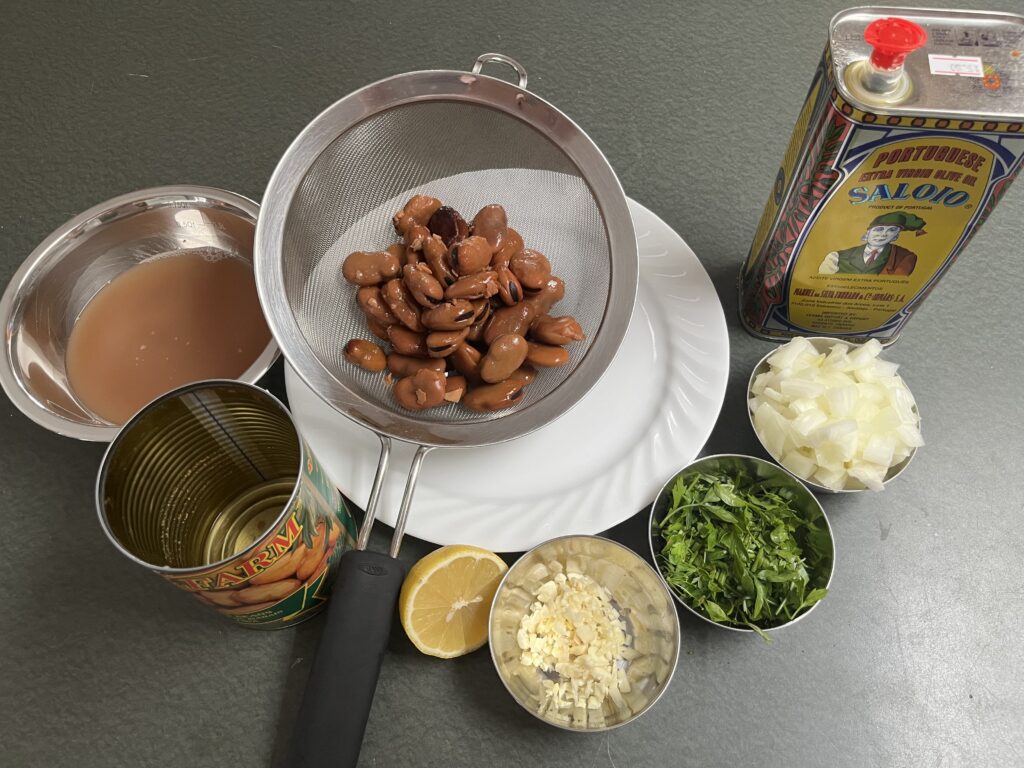
Ingredients:

Lemon slices for garnish

1 can of fava beans

1 bell pepper

2 tbsp olive oil

1/3 of a medium onion, finely chopped

4 cloves of garlic, minced

Chili flakes, to taste (optional, but adds a nice kick)

Chorizo sausage, sliced

Salt, white pepper, and paprika, to taste

1/2 cup fresh parsley, chopped

Juice of half a lemon

Extra olive oil for drizzling

Warm Portuguese buns for serving

Instructions:

  1. Prepare the Fava Beans: Open the can of fava beans, separating the beans from the juice. Reserve the juice, as it will help thicken the stew later. If desired, you can peel the beans to remove their outer skins. This step is optional, and peeling them results in a smoother, creamier texture, while leaving them unpeeled adds a bit more bite to the stew.
  2. Sauté the Aromatics: In a large pan, heat 2 tablespoons of olive oil over medium heat. Once the oil is hot, add the finely chopped onion and minced garlic. Sauté for a few minutes, stirring frequently, until the onion becomes translucent and fragrant. Add the bell pepper to the pan. If you like a bit of heat, sprinkle in some chili flakes at this stage.
  3. Cook the Fava Beans: Add the fava beans to the pan with the onions and garlic, frying them gently. Let them soak in the flavor from the aromatics, stirring occasionally. After a few minutes, pour in the reserved fava bean juice. This is where the magic happens—the juice will thicken as it simmers with the beans, creating a rich, velvety base for the stew.
  4. Add the Chorizo: Once the stew starts to thicken, toss in the sliced chorizo sausage. The chorizo adds a deep, smoky flavor that complements the earthiness of the fava beans perfectly. Cook for another 5-7 minutes, allowing the chorizo to release its oils and flavor into the stew.
  5. Season to Taste: Add salt, white pepper, and paprika to taste. The white pepper provides a gentle, aromatic heat, while the paprika adds warmth and color. Taste as you go, adjusting the seasoning until you achieve the perfect balance of flavors.
  6. Finish with Fresh Herbs and Lemon: Once the stew has thickened to your liking, turn off the heat. Stir in the fresh parsley and the juice of half a lemon. The parsley adds brightness and freshness, while the lemon juice gives the dish a zesty tang that cuts through the richness of the beans and chorizo.
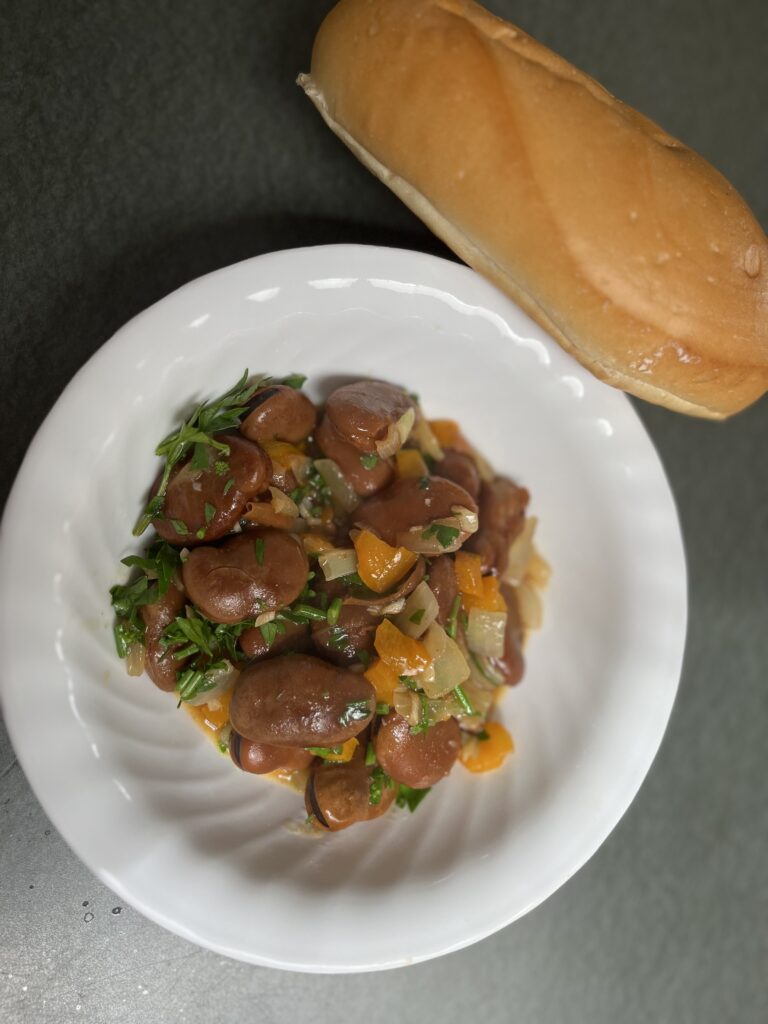
  7. Serve: Drizzle a little extra olive oil on top of the stew for a finishing touch. Serve the stew with warm Portuguese buns, perfect for soaking up every last bit of the flavorful sauce. Garnish with a slice of lemon on the side for those who enjoy an extra citrusy kick.

Variations and Customizations

Like all family recipes, this fava bean stew has evolved over the years. While the base remains the same, different members of the family have made their own tweaks depending on what’s available or to suit their preferences. Here are a few variations that you might want to try:

Vegetarian Version: If you prefer a vegetarian version of the stew, you can easily omit the chorizo. The beans are flavorful enough on their own, especially with the addition of the onion, garlic, and seasonings. To give the dish a bit more substance, consider adding other vegetables such as bell peppers, zucchini, or spinach. You can also sprinkle some feta or a vegan cheese alternative for added texture

Spicier Stew: If you love heat, increase the amount of chili flakes or swap them out for fresh chilies. You could even add some smoked paprika for an extra layer of spice and smokiness.

Add Tomato: It’s that time of year again – tomatoes abound! If you’re into a ‘saucier’ sauce. Be sure to cook them down along with the onions. Have too many to use? Check out our guide on canning tomato sauce.

Different Proteins: While chorizo is the traditional meat in this recipe, you can experiment with different types of sausage or even other proteins like diced chicken or pancetta. Each option will bring a unique flavor to the dish while keeping it hearty and satisfying.

Herb Substitutes: If you don’t have parsley on hand, other fresh herbs like cilantro or basil can work well. Each herb will bring a different character to the stew, but the brightness of fresh herbs is essential to balance the dish.

Serving Options: Though our family always serves this stew with warm Portuguese buns, you could serve it over rice, quinoa, or even mashed potatoes. The stew is rich enough to complement a variety of sides, so feel free to make it your own.

    Why This Stew is Special

    What makes this fava bean stew so special in my family is not just its delicious, hearty nature, but the memories it carries. I remember sitting around the kitchen table as a child, watching my grandma prepare this dish with care, each ingredient added with intention. The smell of garlic frying in olive oil would fill the house, signaling that something wonderful was about to happen. Now, as an adult, I find myself recreating this same experience, sharing the meal with friends and family, keeping the tradition alive.

    This dish isn’t just a stew—it’s a story of resilience, creativity, and the ability to make something truly special out of humble ingredients. With each spoonful, you’re not just tasting beans and sausage, but also generations of love and care.

    So the next time you’re in the mood for something hearty, flavorful, and packed with history, try making this fava bean stew. Serve it with a slice of lemon and a warm bun, and enjoy a meal that’s as rich in tradition as it is in flavor.

    A Family Tradition: Hearty Fava Bean Stew with Chorizo

    Recipe by adminCuisine: PortugueseDifficulty: Easy
    Servings

    4

    servings
    Prep time

    10

    minutes
    Cooking time

    10

    minutes

    Ingredients

    • 1 can fava beans

    • 2 tbsp oil plus 1tbsp for drizzling

    • 1/3 medium onion, finely chopped

    • 1 bell pepper, chopped

    • 4 cloves of garlic, minced

    • chili flakes to taste

    • chorizo sausage

    • salt, white pepper, paprika to taste

    • 1/2 cup fresh parsley

    • juice of 1/2 lemon

    • Buns or rolls for serving

    • lemon slices as garnish

    Directions

    • separate beans from shells if desired and strain to reserve juice
    • fry olive oil, 1/3 onion, garlic and chili flakes (if using)
    • Add beans to the pan along with reserved juice
    • Add chorizo to the pan
    • When sauce has thickened slightly, remove pan from heat
    • add salt, white pepper and paprika to taste
    • add fresh parsley and lemon juice
    • Finish with a drizzle of olive oil and a lemon wedge as garnish

    Organic Peanut Butter Cookies

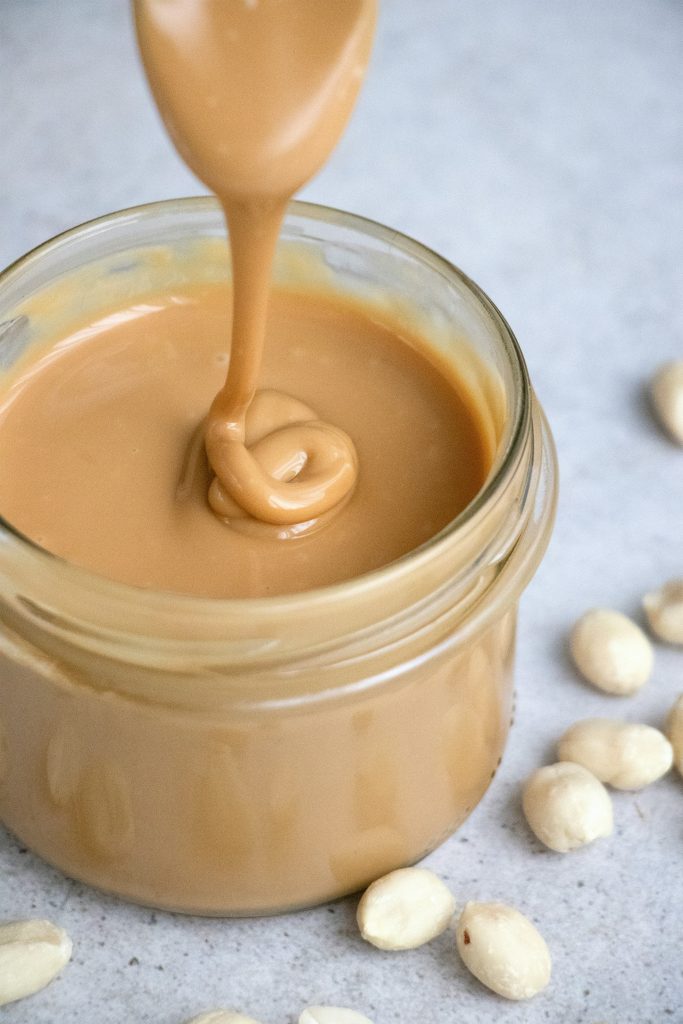
    Organic peanut butter has been a pantry staple for health-conscious individuals for decades. This natural spread is prized for its rich, nutty flavor and creamy texture. But what exactly sets organic peanut butter apart from the conventional variety? In this article, we delve into the benefits of organic peanut butter and share a delectable recipe that showcases its versatility and taste. Let’s start by exploring what makes this peanut butter a superior choice.

    The Benefits of Organic Peanut Butter

    Purity and Health Benefits

    Organic peanut butter is made from peanuts that are grown without synthetic pesticides, herbicides, or fertilizers. This ensures that the final product is free from harmful chemicals and genetically modified organisms (GMOs). As a result, it retains more of its natural nutrients, such as healthy fats, protein, fiber, and essential vitamins and minerals like vitamin E, magnesium, and potassium.

    Environmental Impact

    Choosing organic peanut butter also supports environmentally sustainable farming practices. Organic farming methods promote soil health, biodiversity, and water conservation. By opting for organic products, consumers contribute to reducing pollution and conserving natural resources.

    Superior Taste and Quality

    Many people find that organic peanut butter has a richer and more authentic peanut flavor compared to its non-organic counterparts. This is because it typically contains fewer additives, preservatives, and sweeteners, allowing the natural taste of the peanuts to shine through.

    A Delicious Recipe Featuring Organic Peanut Butter

    Now that we’ve established the benefits of organic peanut butter, let’s put it to good use in a mouth-watering recipe. These organic peanut butter cookies are a delightful treat that combines the nutty goodness of peanut butter with a hint of molasses for added depth of flavor.

    Organic Peanut Butter Cookie Ingredients:

    – 1 cup organic peanut butter (smooth or chunky)

    – 1/2 cup butter (room temperature)

    – 1 1/4 cups granulated sugar

    – 1 tablespoon cooking molasses

    – 1 egg

    – 1 teaspoon vanilla extract

    – 2 tablespoons nut or dairy milk

    – 1 3/4 cup all-purpose flour

    – 1/4 teaspoon salt

    – 1 teaspoon baking soda

    Directions

    1. Preheat the Oven: Preheat your oven to 350°F (175°C) and line your baking sheets with parchment paper or silicone baking mats.

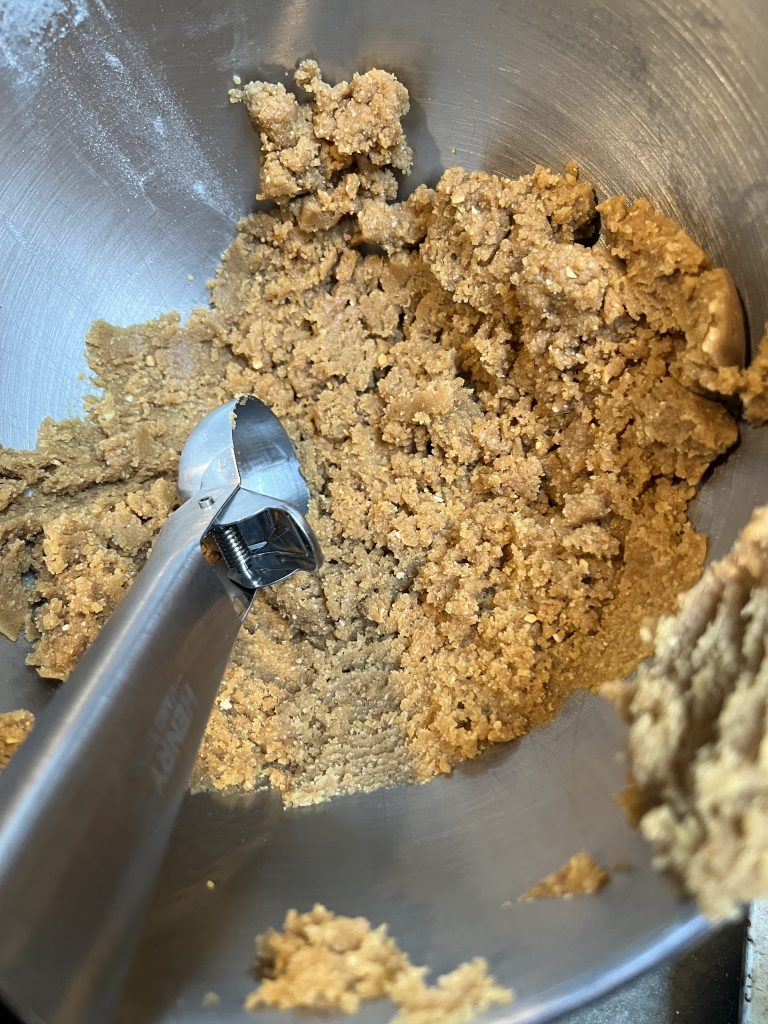
    2. Mix Wet Ingredients: In a mixing bowl, combine the organic peanut butter, butter, granulated sugar, molasses, egg, vanilla extract, and milk. Mix until the ingredients are well-blended and creamy.

    3. Combine Dry Ingredients: In a separate bowl, whisk together the all-purpose flour, salt, and baking soda.

    4. Form the Dough: Gradually add the dry ingredients to the wet mixture, mixing until well-combined and a soft dough forms.

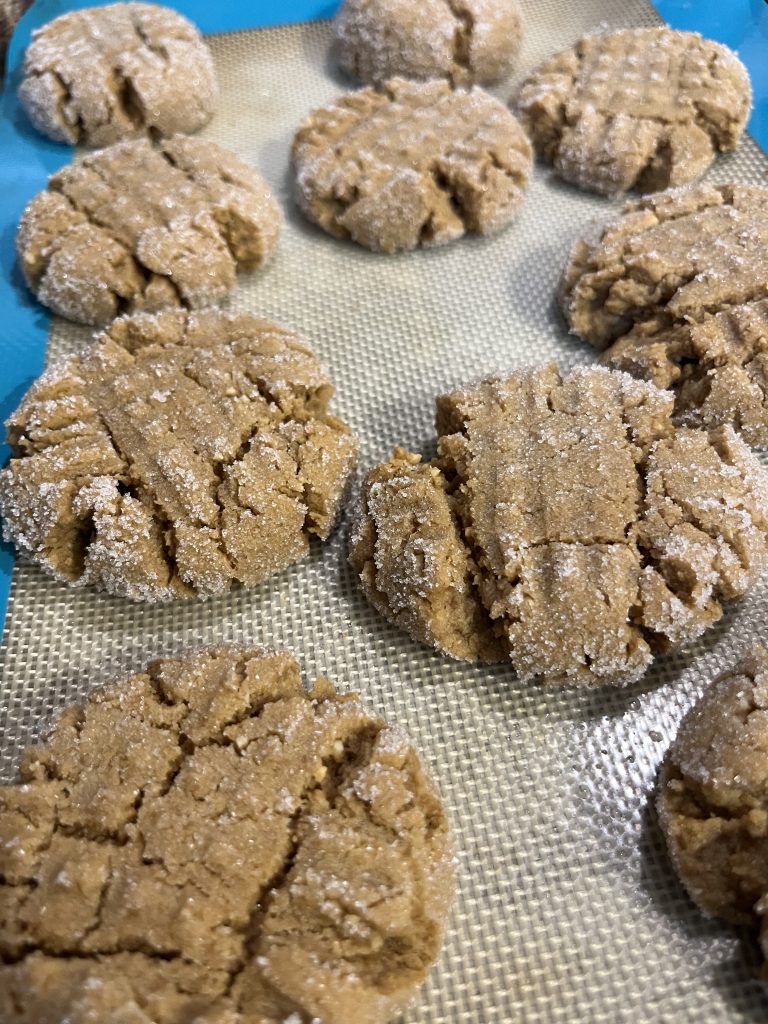
    5. Shape the Cookies: Roll the dough into 24 balls and space them out on your prepared baking sheets, allowing for some expansion (about 8 cookies per sheet). If desired, roll each ball in white sugar for a sweet, crunchy coating.

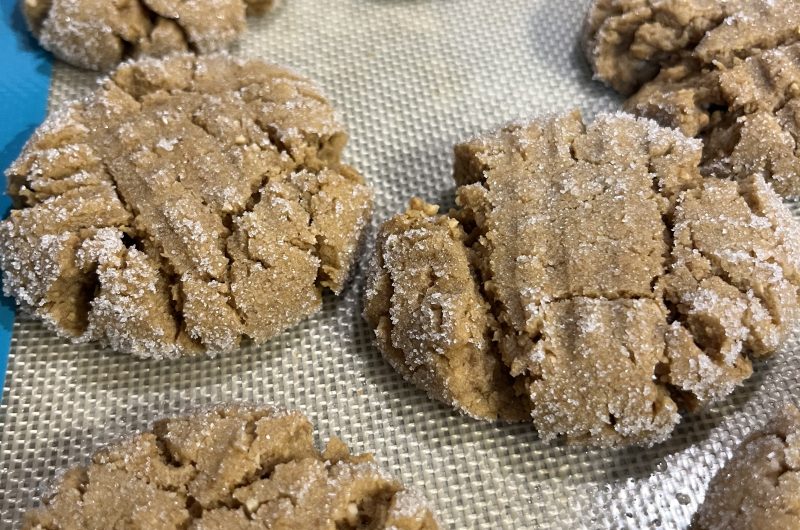
    6. Flatten the Cookies: Use a fork or the bottom of a glass to press the balls slightly, creating a classic crisscross pattern on top.

    7. Bake: Bake the cookies for 11-12 minutes, or until they are lightly golden around the edges. Be careful not to overbake, as the cookies will continue to firm up as they cool.

    8. Cool: Allow the cookies to cool on the baking sheet for a few minutes before transferring them to a wire rack to cool completely.

    Tips and Variations

    1. Chunky vs. Smooth: Whether you prefer chunky or smooth peanut butter, either will work perfectly in this recipe. Chunky peanut butter adds a delightful texture with bits of peanuts in every bite.

    2. Nut Milk Options: For a dairy-free option, use almond milk, soy milk, or any other nut milk of your choice. Each type of milk can subtly alter the flavor of the cookies, allowing for customization based on your preference.

    3. Add-Ins: Enhance your cookies with various add-ins. Chocolate chips, raisins, or chopped nuts like pecans or walnuts can add extra flavor and texture.

    4. Gluten-Free Option: To make these cookies gluten-free, substitute the all-purpose flour with a gluten-free flour blend. Ensure that the baking soda is also gluten-free.

    5. Healthier Sweeteners: For a healthier alternative to granulated sugar, try using coconut sugar or organic cane sugar. Both options provide a more natural sweetness and can slightly alter the flavor profile of the cookies.

    Conclusion

    Natural peanut butter is more than just a health trend; it’s a delicious and nutritious choice that benefits both you and the environment. By incorporating it into your baking, you not only enjoy the superior taste and quality but also support sustainable farming practices. This cookie recipe is a perfect way to savor the wholesome goodness of organic peanut butter. Whether you’re making them for a special occasion or simply to satisfy a sweet craving, these cookies are sure to delight. Enjoy baking and indulging in these delectable treats, knowing that you’re making a positive choice for your health and the planet.

    Organic Peanut Butter Cookies

    Recipe by adminCourse: DessertDifficulty: Easy
    Servings

    24

    servings
    Prep time

    15

    minutes
    Cooking time

    15

    minutes

    Ingredients

    • 1 cup organic peanut butter (smooth or chunky)

    • 1/2 cup butter (room temp)

    • 1 1/4 cups granulated sugar

    • 1 tbsp cooking molasses

    • 1 egg

    • 1 tsp vanilla extract

    • 2 tbsp nut or dairy milk

    • 1 3/4 cup all-purpose flour

    • 1/4 teaspoon salt

    • 1 tsp baking soda

    Directions

    • In a mixing bowl combine peanut butter, butter, sugar, molasses, egg, vanilla and milk.
    • In a separate bowl, combine flour, salt and baking soda.
    • Add dry ingredients to mixer and mix until well combined.
    • Roll the batter into 24 balls and space them out on your baking sheet to allow for some expansion (about 8 cookies per sheet).
    • Optional: Roll balls in white sugar to coat.
    • Use a fork or the bottom of a glass to press the balls slightly.
    • Bake at 350 degrees for 11-12 minutes and allow to cool slightly before moving to cool on a wire rack.